Tongs
I covered forging hammers in the previous post. We also spent a lot of time at the end of the class on making tongs.
As usual, more photos and larger versions are available on Flickr.
Hammers are relatively simple shapes: a block with a hole in it, and maybe one end shaped in an interesting way. Not so tongs. There are probably many ways to make tongs, but the one we covered is a long series of steps. If you make a mistake on one of the steps, it’s quite hard to recover, so we spent several class sessions just practicing making blanks.
The process goes something like this:
- Take a piece of square bar, marked 1.25” from one end
- Use a bar-shaped tool under the power hammer to make a 45° impression at that mark. This creates the pivot point around which the tongs will open or close
- Flatten the long end to start forming the rein (handle)
- Mark 1” in from the pivot using the hot cut on an anvil
- Use a butcher to indent the side of the rein at the hot cut mark
- Taper that down towards the end of the rein
- Clean up the reins so that they’re tapered and break the corners
- Use a butcher at the original mark on the opposite side, and forge the jaw down to that
This results in a lightning bolt kind of shape where one end is long and thin and the other is short and thick.
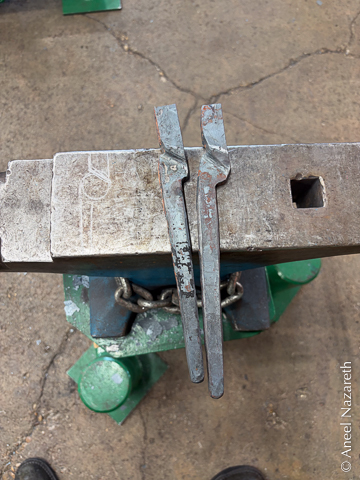
After making two of these—hopefully pretty similar—it’s time to fit them up and see where to remove material on the belt grinder. After roughing them in, the center is marked and a hole drilled. A rivet is placed through the hole and further refinement is done on the grinder to make sure they close properly and have even length jaws. This would be a good time to imprint them with a maker’s mark, but I didn’t realize this until too late.
The rivet is cut to length (the rule is 1.5 times the diameter should be sticking out) and then the straight end is heated and upset to form the second head of the rivet.
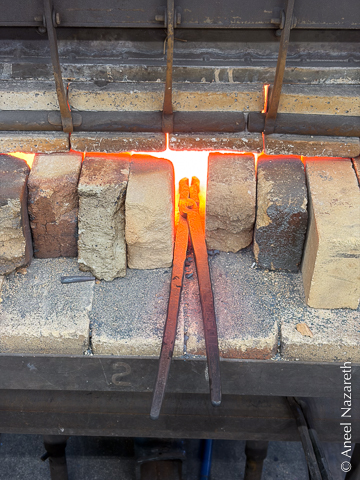
Finally, the jaws are shaped. They’re heated in the forge and then hammered into shape at the anvil. The first pair of tongs I made was for holding the hot tools that I made previously. This meant that I grabbed a hot tool of the same thickness and hammered the jaws with it inside, getting them to conform to it. Opening and closing the tongs while they’re hot makes the rivet move smoothly.
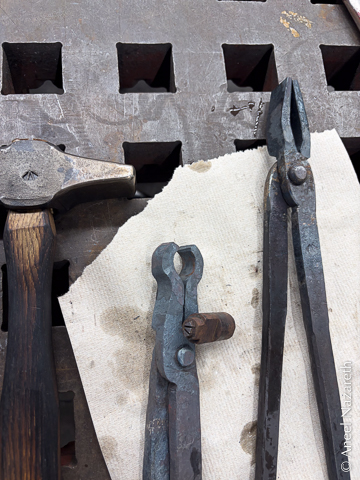
I had an extra set of blanks on the last day (having come in during a different class to practice), so I made a pair of flat jaw tongs as well. The last step of this was to imprint my touchmark (which I machined) on them. I did this by holding the mark in tongs that I had forged and hitting with a hammer that I had forged.
Satisfying!
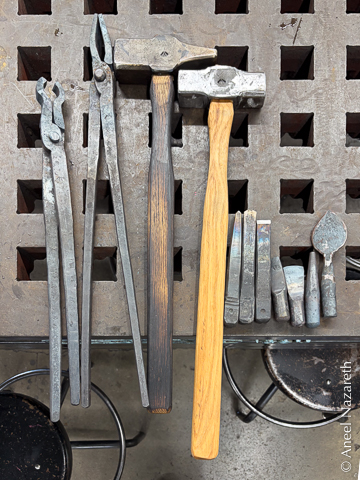
Here’s the complete set of tools that I forged in this class:
- round tool-holding tongs
- flat jaw tongs
- hardened cross peen hammer
- unhardened hammer
- center punch
- weird center punch
- cold chisel
- slot punch
- hot cut
- round punch
- leaf (not a tool)
I baked on a vegetable oil finish at home (like seasoning a pan) to make them less susceptible to rust.

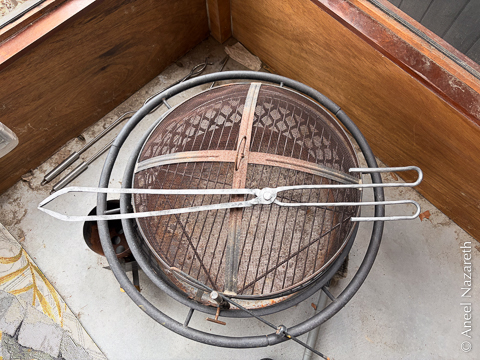
As a bonus… last semester I forged a pair of fire tongs in my extra time in class. But when I tried to get them to come together, I realized that I didn’t know how tongs worked. I took some extra time after I finished all of the tools to use what I’d learned to fix them.