Casting Wrapup
When we left off at spring break, I’d started a bunch of assigned pieces and was playing around with castable 3D Printing filament. In the second half of the class I did several more assigned projects and cast way too many 3D Prints.
Obligatory “more images here” link: Casting 1 JLRY-1409 | Flickr
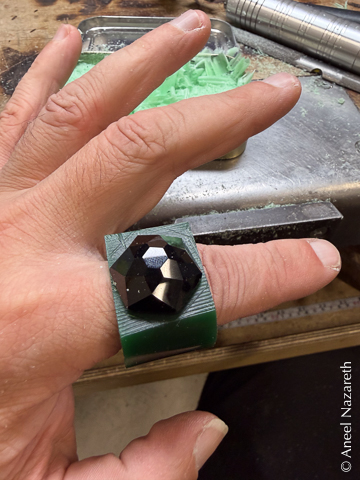
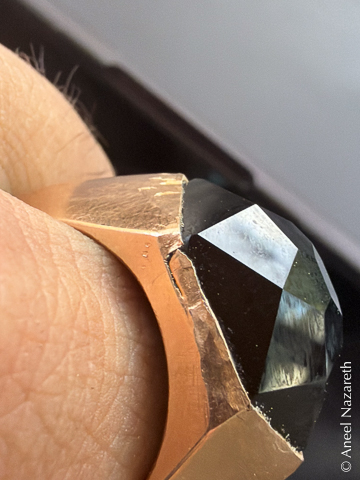
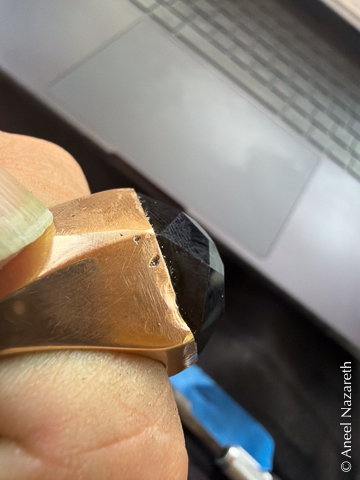
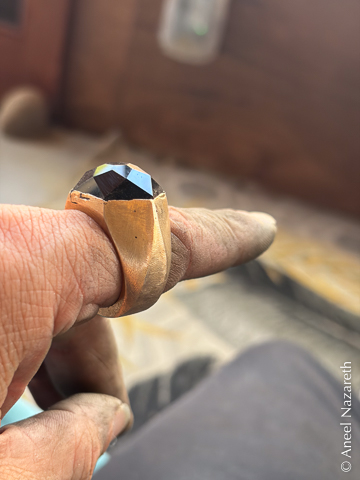
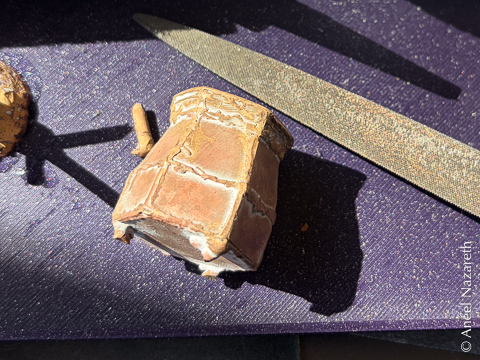
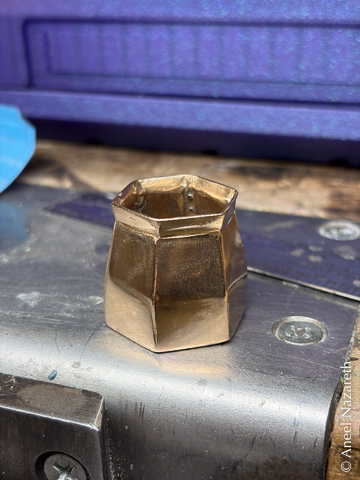
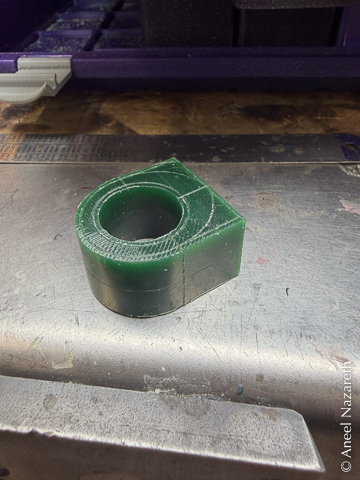
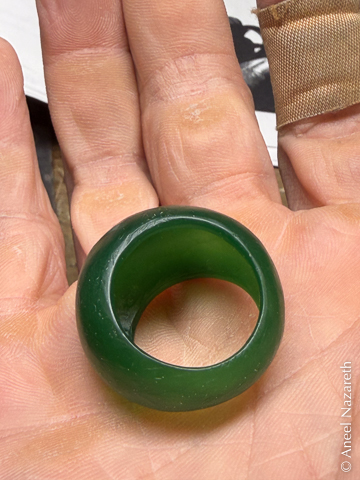
When ordering jewelry supplies, I always check the website for special sales. One of the things I noticed this time was a ridiculous 20mm onyx for something like $8. How could I resist? I started sculpting a ring to hold it. The base of the stone was hexagonal, so I tried to make the planes of the band smoothly transition into the faces of the stone. I don’t know how to set stones with prongs, so this would be set like the cabochons from last semester. I formed a bezel around the stone in wax. It cast reasonably well.
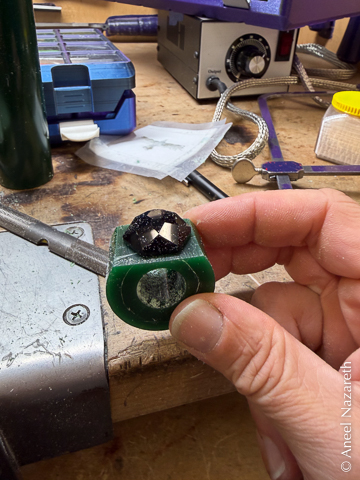
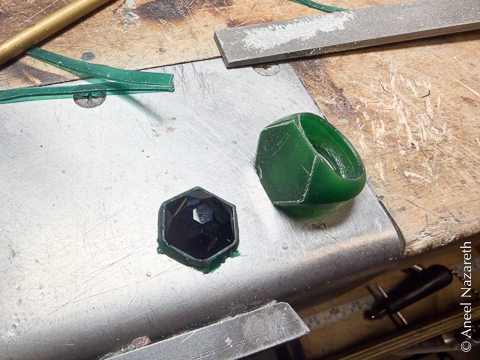

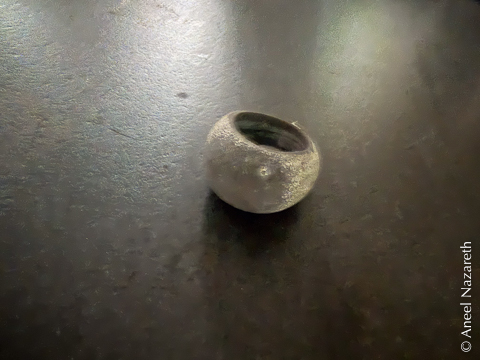
Unfortunately, reasonably well doesn’t really cut it for getting a stone to fit nicely into a bezel, so I spent a lot of time trying to grind out the recess to fit better. I went as far as machining a steel hexagonal punch to form the bronze around (this didn’t really help).
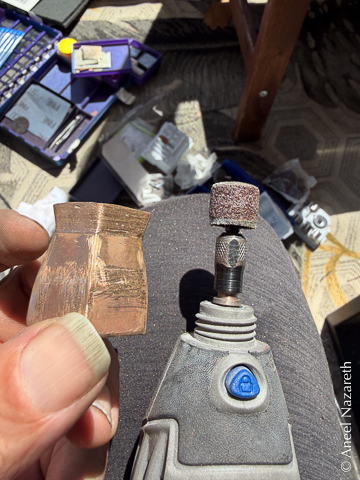
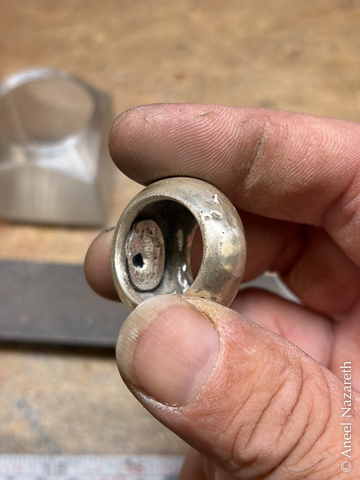
Once the stone fit into the recess well enough, I secured the stone with wax and tried tapping the bezel tight. My nemesis, work holding, reared its head again. This time I tried using thermo loc (a material that becomes pliable in hot water, but is rigid at room temperature) and a jeweler’s vise. For my silver bezels last semester, I was able to push the metal around with a tool, but the bronze was hard enough that I had to hit it. I used a small chasing tool and a chasing hammer.
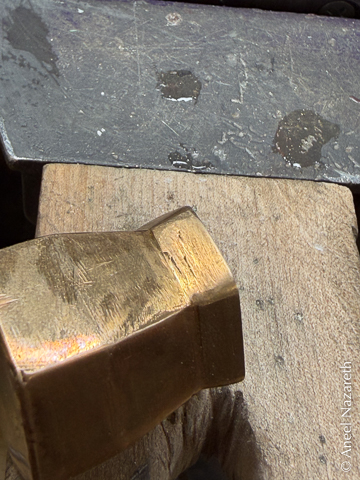
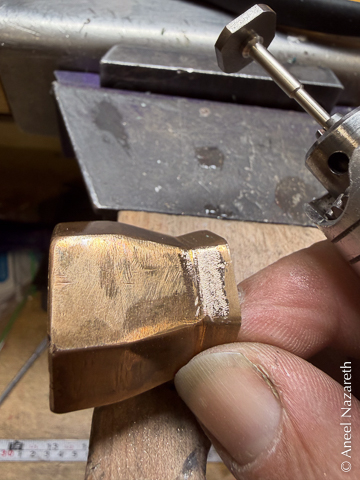
I hit it too hard and damaged the bezel during the tightening. It was already marginal because of all of the grinding I had to do to get it to fit the stone, and I was striking too hard or the chasing tool didn’t have a large enough surface area. A crack spread along one side and there was visible denting elsewhere.
I think I’m going to pop the stone out of this ring and use it for something else (a pendant?). Partly because I’m disappointed with how the bezel came out, but also because it’s quite uncomfortable for me to wear. It’s just too large a mass on my finger.
I definitely learned a lot in this project.
The next assigned project was a sheet wax box. I decided to interpret this liberally and made a thumb-sized hexagonal vase. I designed the object in CAD, printed out a template, and cut the sheet wax to size. I used the wax pen to join the pieces together. In retrospect, I wish I’d worked a little harder on the surface of those joins, because I had a lot of filing to do after casting. I tried doing some of this at home with a Dremel hand-held rotary tool. It made me really appreciate the foot pedal on the flex-shaft rotary tools in ACC’s Jewelry labs. Being able to vary the speed as you go is very helpful.
There were some porosity spots and scratches in the vase, so my instructor suggested I try a rotary planishing tool. Planishing involves imparting a surface texture to a sheet by hitting it a lot (often a smooth texture or intentional faceting). I did a ton of this in the Art Metals class back in 2024 with a hammer. The rotary planisher is a piece of steel with corners that hit the surface as it spins. Definitely a lot faster to get a lot of hits in than with a hammer… I’m pretty happy with the finish I got on this.

Interlude: 3D Printing Miniatures…
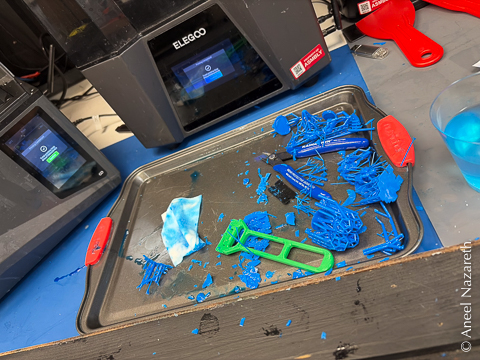
I was pretty unsatisfied with the results of casting with filament prints, even with a 0.25mm nozzle, so I switched to resin prints. Resin printers promise a resolution about ten times finer than that (25 μm). I tried printing with a special wax-based resin so that it burns out with practically no ash. It turned out to be a giant pain to work with. I had terrible layer adhesion and parts would just fail in the middle. I’d be lucky to get a couple salvageable models out of a tray of a dozen. On the plus side, resin printing prints a whole layer at once, so it doesn’t take any more time to print a dozen models than it does to print one.
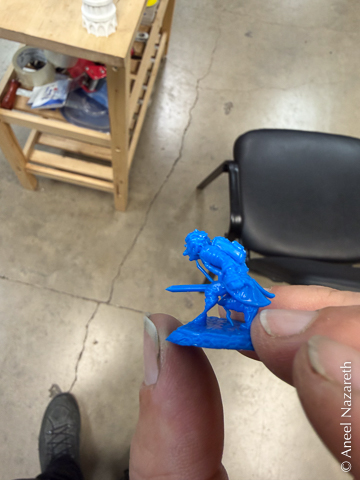
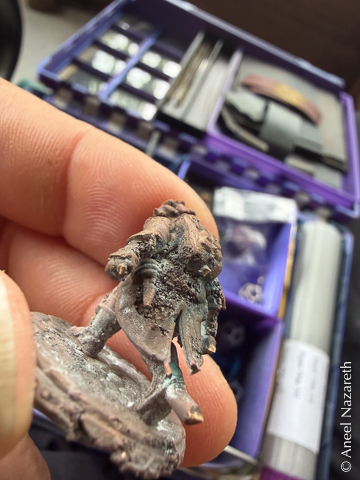
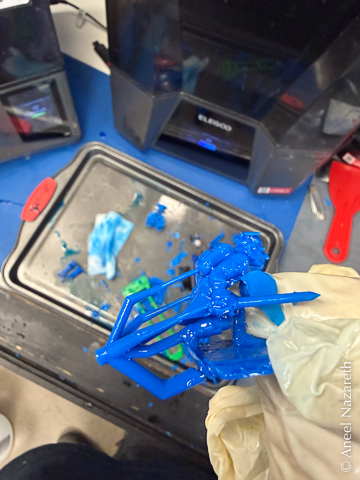
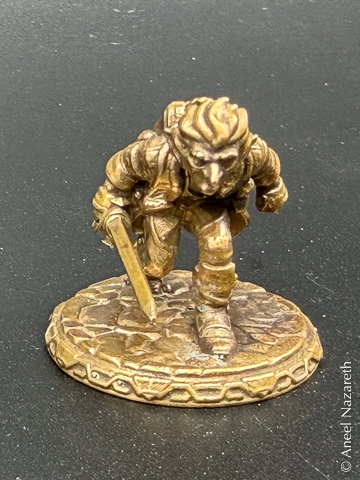
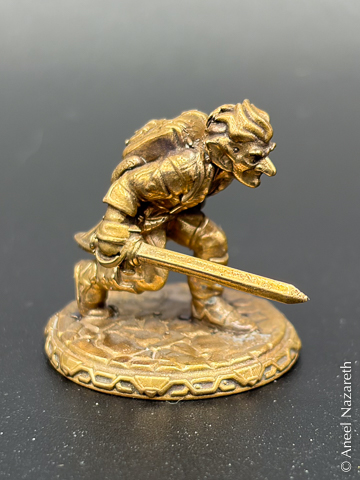
To see if I could, I tried printing a custom model of a Pathfinder (NOT D&D) character of mine that I’d worked up on HeroForge. Initially, I tried spruing it for casting using traditional wax. Predictably, this led to a globby mess because the wax didn’t stick very well to the print and I had to use too much.
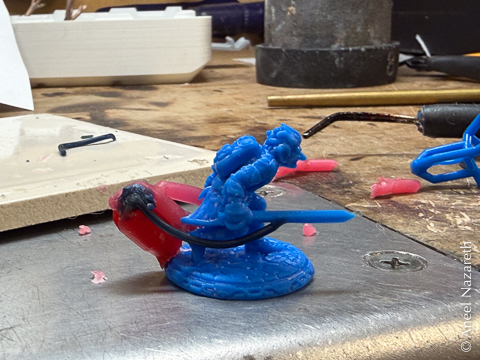
Because of my abysmal printing success rate with the wax resin, I tried the same print using a conventional ABS-like resin. I got a terrible surface texture on that, probably because the resin didn’t burn out completely and stuck to the plaster. I went back to the wax resin and started focusing on designing casting sprues to be printed, rather than attached after the printing.

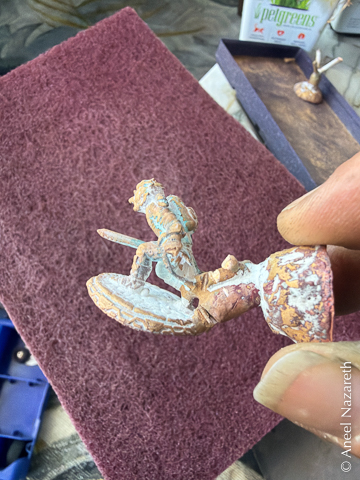
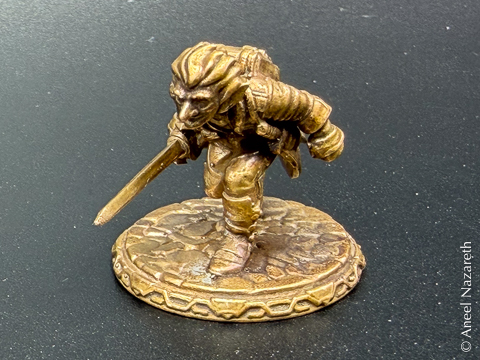
By the end of the semester, I did dial it in well enough to get a good cast of the miniature.
… End Interlude
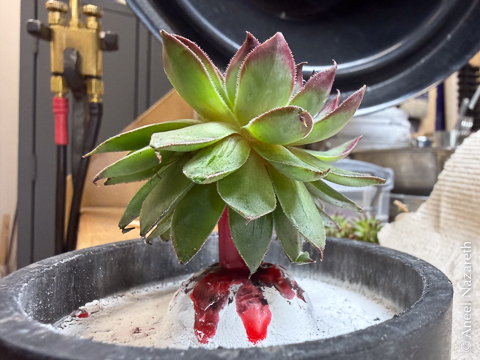
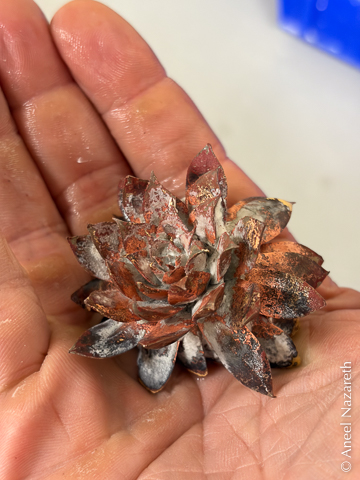
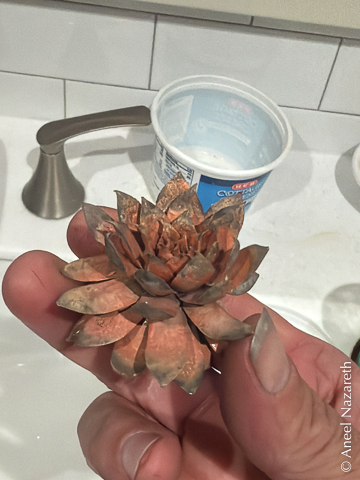
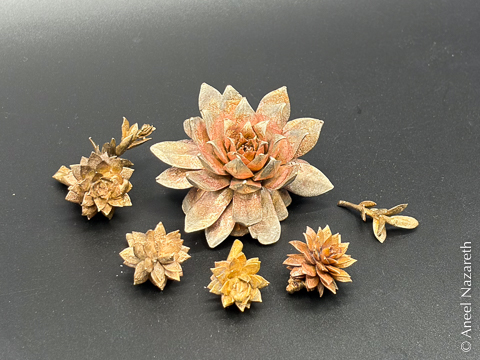
We had a guest presenter for one of our classes. Chad gave us some tips for casting organics. Instead of sculpting plants or insects in wax, why not cast the actual plants or insects? I mean, besides the obvious: they’ll be immolated in the kiln. I bought some succulents, and cast some of the ones that the cats didn’t eat before I could bring them in to class. This worked really well!
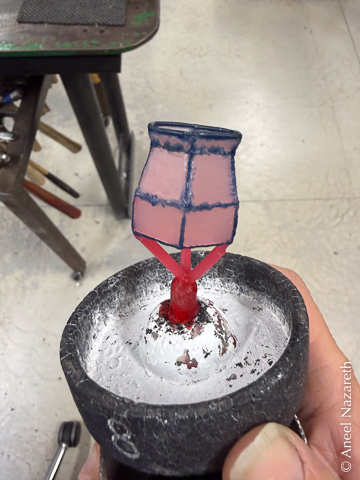
A surprise: when casting, you need to know how much metal to use. Theoretically, you want to use the same volume of metal (with some to spare for the sprues and button) as your model. Measuring volume of irregular objects is a challenge (before you say “Eureka!”… water displacement is surprisingly hard at this scale).
Happily, the density of jeweler’s wax is well known, as is that of each of the metals we’re using, so we can get away with weighing with a conversion factor (ancient bronze is 9 times heavier than wax, sterling silver is 11 times heavier).
We guessed that the succulents would be about as dense as the wax, but it turned out they were significantly less dense. This meant that I didn’t melt enough metal to fill the whole mold. As a result, the bottom leaves of the succulent just… end… at a certain point. This does mean that the casting has a flat bottom so it sits on a table better.
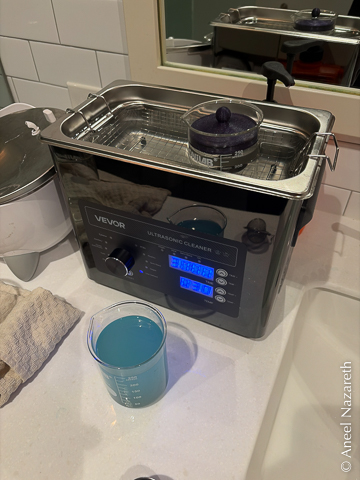
Another surprise: just how hard it is to clean investment from between the leaves of a succulent. I ended up actually buying an ultrasonic cleaner for home and just running the casting through it in a beaker full of vinegar until the plaster dissolved.
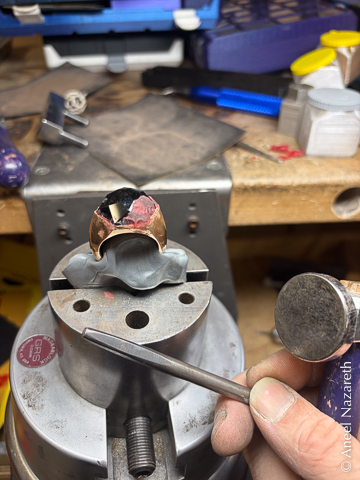
The final assigned project for the class was a dome ring. This was mostly an exercise in precision wax sculpting. We were given detailed instructions on how to scribe certain marks on a ring blank and then smooth that down to a ring with a large domed crown and a hollow behind it. This was actually somewhat like my chunky onyx ring, but designed by someone who’d actually considered the ergonomics of a ring before carving.
I’m pretty happy with how my carving turned out, and the ring fit my partner’s finger, so I decided to splurge and cast it in silver. I hollowed out the ring to about a 2mm thickness throughout to minimize the weight.
The results were… weird.
I didn’t get an in focus picture of the surface of the ring, but it was very rough, with strange coloration. I took it to the department chair who suggested two things had gone wrong: I had gotten the silver too hot, and the silver hadn’t been pure. If investment isn’t fully cleaned off of a casting and the metal is re-used, impurities build up in the silver.
He pointed out another problem. There was a giant bubble under the dome. After going to all of the trouble to hollow out the dome, I sprued it so that it was standing straight up, meaning that air was trapped under the dome as I poured the investment into the flask. Oops.
I polished the ring anyway, hoping to smooth out the rough surface, and something extraordinary happened.
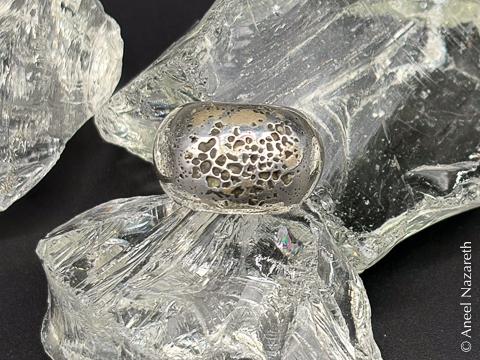
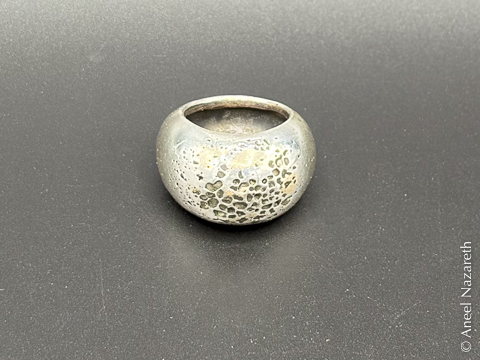
The surface problems weren’t surface problems at all. They were porosity throughout the metal. When polished, the pretense of a smooth surface dissolved and left a cratered texture. The ring looks like a piece of the moon!
What could have caused all of that impurity?
Interlude: 3D Printing dodecahedra…
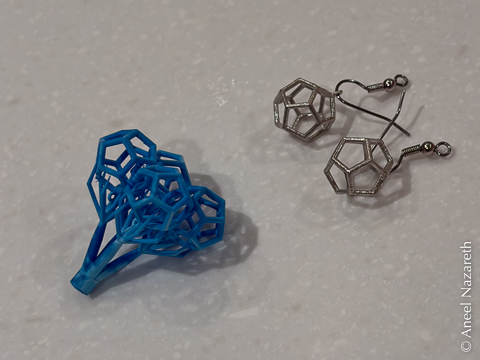
I mentioned those dodecahedra that I’d cast in bronze from filament 3D prints in an earlier post. Well, I never gave up on that. I kept iterating. I was unhappy with the marks that autogenerated sprues for printing left on the surface, so I modeled custom sprues… I wanted to add a bail so the dodecahedron could be used as a pendant, and, rather than try to solder it on, I modeled that too… My instructor suggested that they’d make good earrings, so I worked on making them smaller… I couldn’t get the surface texture perfect, so I tried curing the resin prints under glycerin so they wouldn’t be exposed to oxygen during the cure…
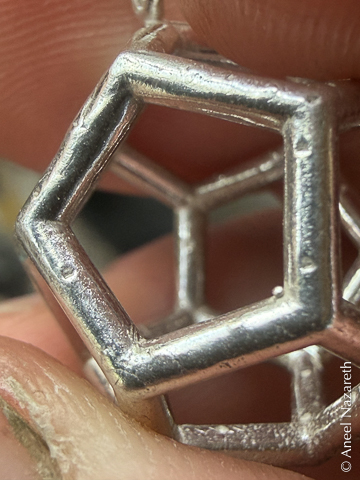
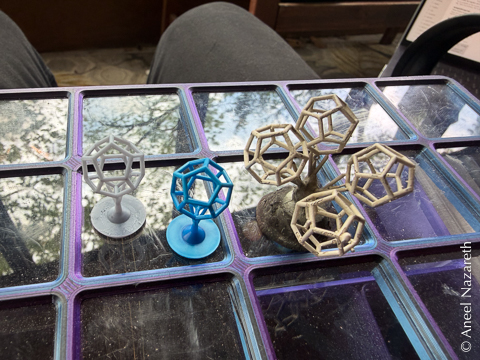
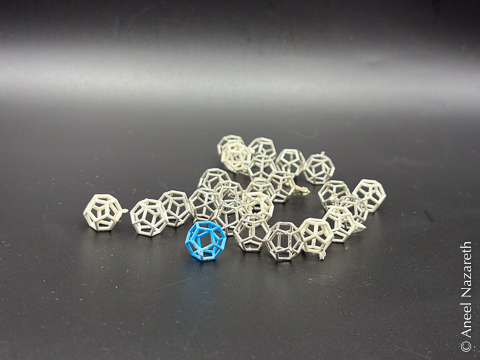
At the beginning of the semester, our instructor told us we could expect to cast around 6 times in the class. I cast at least 24 times. My records are incomplete because sometimes I would cast multiple flasks on the same day with multiple prints of trees of dodecahedra, and only write down the weights for one.
The general rule of thumb is that you should use at least 50% “new” silver in each casting. But I’d only bought a certain amount of silver, and by the end of the semester, I’d utterly abandoned that rule and was casting 90% buttons or scraps.
So. That’s probably why the moon ring came out that way. And maybe I’d get better surfaces if I just used new silver. Good thing I’m taking Casting II next semester!